All Categories
Featured
Table of Contents
- – Water Leak Repair Tierrasanta San Diego, CA
- – Black Mountain Plumbing
- – Plumber Company Near Me Tierrasanta San Diego, CA
- – Shower Repair Near Me Tierrasanta San Diego, CA
- – Gas Line Plumber Tierrasanta San Diego, CA
- – Plumbing Installers Near Me Tierrasanta San D...
- – Water Heater Installers Tierrasanta San Dieg...
- – Plumber For Clogged Toilet Near Me Tierrasan...
- – Kitchen Plumbing Tierrasanta San Diego, CA
- – Residential Plumbing Services Near Me Tierra...
- – Water Filtration Services Near Me Tierrasant...
- – Near Me Plumber Tierrasanta San Diego, CA
- – Plumbing Installers Near Me Tierrasanta San ...
- – Residential Plumbing Repair Near Me Tierrasa...
- – Plumbing Installation Services Tierrasanta S...
- – Best Plumber Tierrasanta San Diego, CA
- – Black Mountain Plumbing
Water Leak Repair Tierrasanta San Diego, CA
Black Mountain Plumbing
9909 Hibert Street Suite E San Diego, CA 92131(858) 536-4161
Black Mountain Plumbing
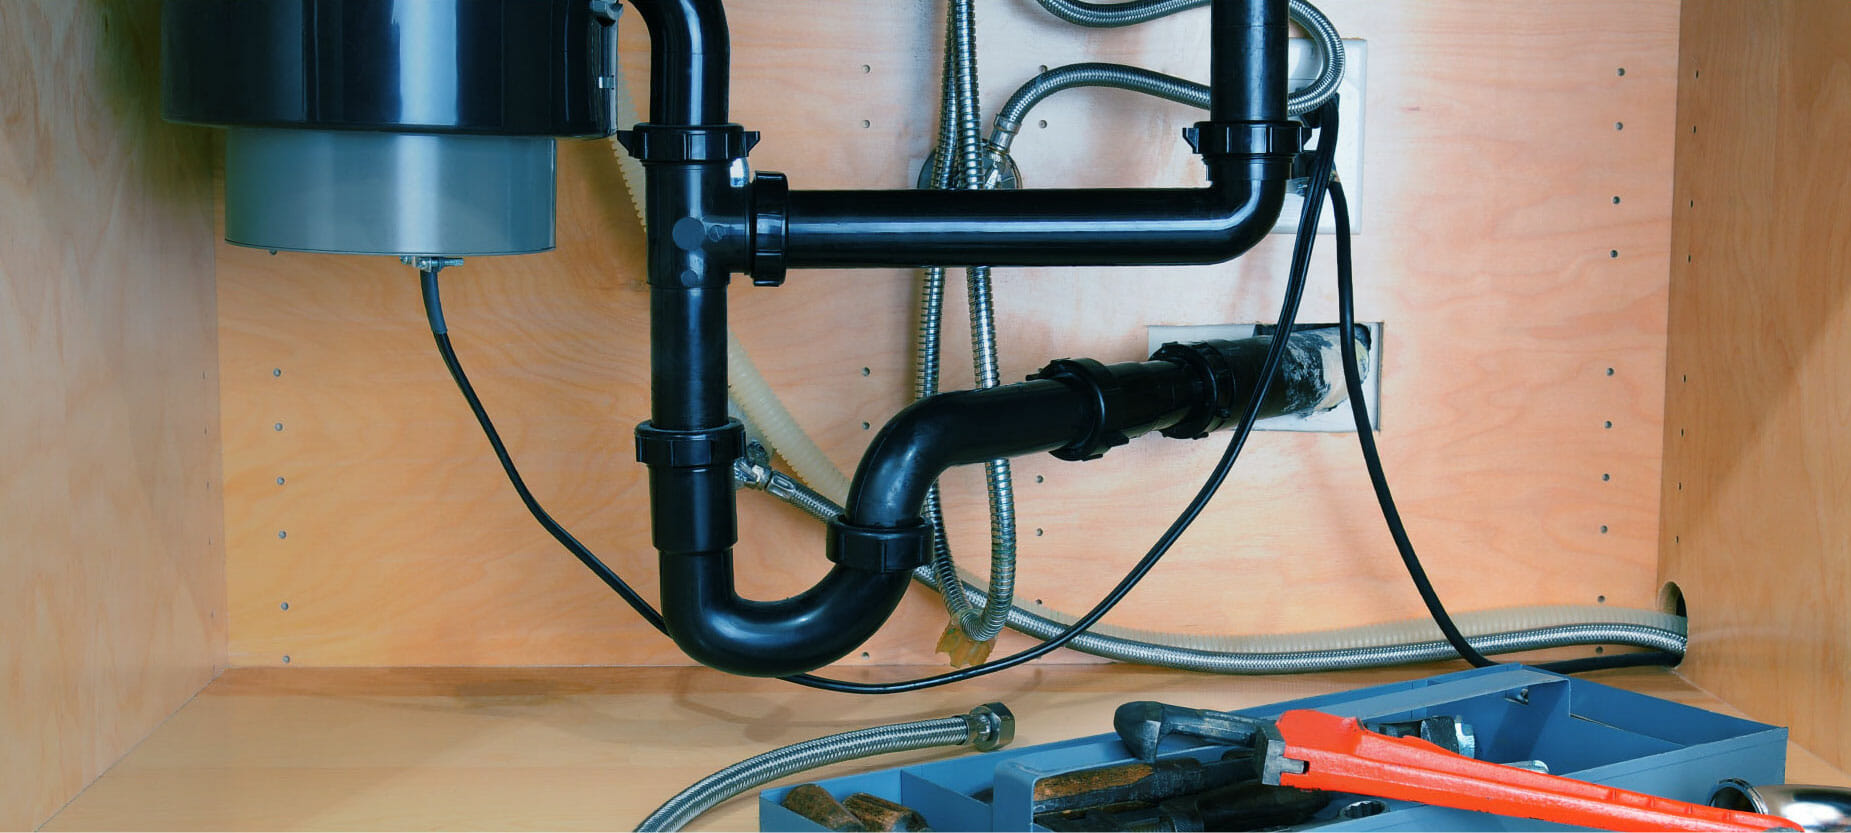
This step consists of cautious placement to the sink drain, attaching water lines, and ensuring a leak-free configuration for reliable garbage disposal. Compliance with regional structure codes and safety and security laws is paramount when you set up a waste disposal. These standards are in area to ensure the safety and efficiency of electric and pipes installments in household setups.
When intending to mount a garbage disposal, it is very important to understand what the procedure requires. Prior to the actual installment, a preliminary assessment is important. This consists of inspecting the existing sink setup, ensuring there suffices area under the sink for the disposal, and figuring out if any added pipes or electrical modifications are required.
This involves detaching it from the power source, removing it from the sink, and carefully removing any linked pipes. Setting up a rubbish disposal usually starts with constructing the device according to the maker's directions. This involves affixing the mounting ring, ensuring correct alignment, and safeguarding it to the underside of the sink.
Plumber Company Near Me Tierrasanta San Diego, CA
This must be done in compliance with electric safety and security criteria and might need the abilities of an electrical contractor if direct wiring is needed. Connecting the disposal to the pipes system is a vital action. This consists of affixing the drain lines, making sure the dish washer drainpipe is linked if relevant, and making certain all connections are tight and leak-free.
You can mount the placing bracket that will certainly hold up your disposal. You can place the disposal and hook it up to the drain plumbing.
Shower Repair Near Me Tierrasanta San Diego, CA
Lift the disposal a little and loosen up the reduced installing ring by pressing or pulling wrenches or screwdriver to the left until the disposal is totally free from installing assembly. Lay the disposal on its side and eliminate the electrical cover plate. Loose the eco-friendly ground screw and remove the cord connectors.
Loosen screws on the electric clamp port and get rid of wires from the disposal. To get rid of the existing installing equipment, loosen up the 3 mounting screws. Pry the breeze ring off with a screwdriver and eliminate the old installing setting up, then press the old sink flange up with the sinkhole. Utilize a screwdriver or putty knife to carefully scratch all old putty from the edge of the sinkhole.
Gas Line Plumber Tierrasanta San Diego, CA
Go down the brand-new sink flange right into the drain opening and press it right into location. Positioning a weight such as your disposal in addition to the sink flange will certainly assist hold the sink flange in place while installing the sink flange to the sink. To stay clear of scratching your sink or the flange, position a towel between the sink surface area and the weight from under the sink.
Next off, get rid of the loosened knockout plug from within of the disposal. Lay the disposal on its side under the sink so you can make the electrical links. Make certain the circuit breaker is off. Remove the plate on the base of the disposal to subject the wiring and use wire adapters to attach the cables from the disposal to the matching cables from the power supply.
Change home plate, to cover the cables. All advancement versions mount similarly, though there are a couple of additional actions with the cover control, more on that particular in a moment. Initially, for all versions aside from cover control, hang the disposal by straightening the 3 mounting tabs with the slide up ramps on the placing ring.
The disposal will currently hang by itself. Place the discharge tube into the discharge coupler, then slide the clamp over the discharge tube and setting it in the groove over the rubber tailpipe coupler. Turn the disposal to make sure that the discharge tube is aligned with the drain trap. If the discharge tube is also long, reduced off as much of the tube as required.
Plumbing Installers Near Me Tierrasanta San Diego, CA
If you are connecting the disposal to a dish washer it may be attached through an air space. Utilize a pipe clamp to affix the drain hose to the dishwasher inlet. Now that everything is installed and ready, secure the disposal to the sink mounting setting up utilizing the unique wrench that included the unit.
For the cover control design, the sink baffle was established at the manufacturing facility. If it has been gotten rid of, it would certainly be a lot easier to put it now prior to mounting the device. Hang the disposal by straightening the 3 placing tabs with the slide up ramps onto the installing ring.
The disposal will certainly currently hang by itself. Revolve the disposal so that the discharge tube is aligned with the drainpipe catch.
Water Heater Installers Tierrasanta San Diego, CA
If you are linking the disposal to a dishwasher it may be connected to an air void. Utilize a hose clamp to connect the drainpipe hose to the dishwasher inlet. Now that every little thing is mounted and ready, lock the disposal to the sink installing assembly utilizing the special wrench that included the device.
It breaks right into location on two of the 3 bolts on the installing assembly. For all versions, you must evaluate for leakages at the sink flange dishwasher tailpipe and installing setting up connections. Lastly turn on the electrical breaker to evaluate its procedure.
Plumber For Clogged Toilet Near Me Tierrasanta San Diego, CA
The trash disposal is a kitchen home appliance that assists in the disposal of food waste. It is important to have a working trash disposal.
Detach the power resource from the waste disposal. Transform the device over, and check the base for the round or square faceplate. This works as the electric residence cover. Remove the environment-friendly screw from the faceplate and area the copper ground cord over it. To separate the tinted wires from the main source of power, pinch the plastic wire connections.
The most vital point to keep in mind is that a lot of them should get replaced. The initial step in changing a damaged installing setting up is to identify if there is any kind of damages to the placing ring and flange. It will certainly need to be replaced if it has actually been broken or cracked.
Kitchen Plumbing Tierrasanta San Diego, CA
To do this, switch off the power to your waste disposal unit and activate the supply of water to your sink. If required, shut off the water to your dishwasher and various other sinks to prevent flooding if something falls short. Loosen up the nut holding back a sink flange with a wrench or pliers so it can be gotten rid of from its installing location.
With a flathead screwdriver, remove old sink flanges by pressing in on them with your fingers while they are still affixed to their installing hardware. Depending on what sort of trash disposal you have installed in your kitchen, there might be more than one kind of flange, however many will certainly have two screws that secure them to their installing openings in an electrical outlet.
Using a huge wrench, loosen the bolts holding the sink flange to the sink. Get rid of the old sink flange. The old flange might be rusted, so utilize a crowbar or hammer to break it free. Apply plumbing professional's putty. When you have separated your sink flange and the drain line, eliminate any type of particles inside it.
Residential Plumbing Services Near Me Tierrasanta San Diego, CA
Add a couple of drops of dishwashing liquid into this location to assist loosen up any kind of staying material from inside the pipe. This permits any kind of loose product to pass through easier. Attach the brand-new place. Move the rubber gasket over the bottom of your brand-new sink flange initially, after that a 2nd steel flange, functioning in reverse order this time around.
With one hand holding the setting up in position, utilize the other to tighten up the screws versus the reduced flange. Below are the pointers for the final installation action. Safeguard the replacement disposal onto the installing ring: The mounting ring is a huge ring that rests below your sink and holds the disposal.
Water Filtration Services Near Me Tierrasanta San Diego, CA
Reattach the electrical cables: The electric cords for your disposal are situated under a rubber cap affixed with Velcro strips. Reattach them to their equivalent terminals on your new unit, then reconnect them to their matching terminals on your electrical box.
Open the tap and let the water flow for 15 to 20 seconds. Ensure no water leaks from connection points bordering the brand-new device while running. You should not experience any kind of problems as long as each component has actually been set up well. Use a line of Teflon pipe joint compound or a strip of string seal tape to seal any type of little leakages you notice.
Near Me Plumber Tierrasanta San Diego, CA
If needed, trim the discharge tube. There's a substantial possibility that the discharge tube won't be the appropriate length to connect to the ground pipes shutoff if you've upgraded to a larger disposal or among a various kind. The good news is, this is a very easy repair service; mark the location on the tube where it ought to align with the drain pipeline and make use of a hacksaw to cut it to dimension.
When you are done with the installation, transform the waste disposal unit breaker to the "On" placement. Go back to the kitchen area and switch on the disposal with the button. Pay attention to the noise. No humming, grinding, or excessive resonance should exist. See to it there are no devices, screws, or various other loosened items in the sink that could spoil what you just fixed.
Call a qualified plumbing technician to look at the new disposal if it is making unusual sounds or doesn't seem to be functioning appropriately. There might be a problem with the tool's internal mechanisms.
Plumbing Installers Near Me Tierrasanta San Diego, CA
Setting up a brand-new waste disposal requires careful factor to consider of various factors to maintain ideal kitchen performance. Consulting with a local plumbing helps homeowners determine about disposal option and installment requirements.
Physical measurements should accommodate available under-sink area. Measurements should represent plumbing links and electric demands. Appropriate sizing prevents installment complications while keeping cupboard storage area. A lot of disposals require dedicated electric circuits. Existing circuitry might need updating to meet current security codes. Specialist installment by a neighborhood plumber consists of appropriate electrical connections and safety and security verification.
Residential Plumbing Repair Near Me Tierrasanta San Diego, CA
Various versions use numerous grinding systems. Constant feed systems operate while water runs, while set feed models require covers for procedure. Each kind provides distinct advantages relying on use patterns. Multi-stage grinding supplies even more complete waste handling. Advanced systems decrease strain on plumbing while improving effectiveness. Expert installation enhances grinding performance through appropriate change.

The initial acquisition rate stands for only part of the complete setup cost. Professional setup, needed adjustments, and prospective upgrades affect overall expenditures. Quality setup stops future repair work expenses.
A waste disposal that hums or appears like metal grinding on metal is a sure-fire indicator that it's time to replace it. Maintain in mind that a waste disposal unit that isn't functioning right can be revived with a basic fix. Here are a few things to try prior to going to the hardware store and buying a brand-new system.
Make use of a flashlight to look for objects that may have gotten lodged, and get them with a pair of tongs or needle-nose pliers. Second, look underneath the garbage disposal and locate the opening straight in the center. Using a hex wrench or a common Allen wrench, rotate the wrench to and fro to manually reset the motor.
Plumbing Installation Services Tierrasanta San Diego, CA
If none of these methods function, it's time to go ahead and replace the waste disposal. Unlike various other home enhancement jobs that might need a range of special tools, to change a waste disposal, you'll mostly require devices you possibly already have on hand.
It's a good concept to take a photo of your existing waste disposal unit so you can ensure you're replacing each piece in the right order. Then, open up package with the new waste disposal unit inside. Validate that it consists of all of the pieces that are similar to the old system.
Head to your major circuit breaker and transform off power to the system. There may be a breaker devoted to the waste disposal, or you may have to close off power to the whole cooking area.
Best Plumber Tierrasanta San Diego, CA
Get rid of the old strainer to the garbage disposal. Find the thin metal ring on the old trash disposal.
Separate the disposal from the power supply by transforming the system over and locating the faceplate for the electrical housing. Remove the sink flange by shaking or pressing below the flange and lifting it out from the top.
Black Mountain Plumbing
Address: 9909 Hibert Street Suite E San Diego, CA 92131Phone: (858) 536-4161
Email: blackmtnplumbing@gmail.com
Black Mountain Plumbing
Apply plumber's putty to the bottom of the brand-new sink flange. Continue the slim end of the flange versus the drainpipe opening and press the flange in area. Hold the brand-new flange in position for a minimum of 30 seconds so the putty can adhere effectively. Because you don't want the brand-new flange to shift while you're mounting the brand-new waste disposal, ask an assistant to firmly push down on it while you're functioning.
Best Plumber Tierrasanta San Diego, CAPlumbers In Tierrasanta San Diego, CA
Plumbers In Tierrasanta San Diego, CA
Plumbing Installers Near Me Tierrasanta San Diego, CA
Plumbing Installation Near Me Tierrasanta San Diego, CA
Water Line Repair Tierrasanta San Diego, CA
Near Me Plumber Tierrasanta San Diego, CA
Water Leak Repair Tierrasanta San Diego, CA
Water Line Repair Tierrasanta San Diego, CA
Water Line Repair Tierrasanta San Diego, CA
Affordable Plumber Near Me Tierrasanta San Diego, CA
Water Line Repair Tierrasanta San Diego, CA
Plumber Toilet Repair Tierrasanta San Diego, CA
Water Heater Installers Tierrasanta San Diego, CA
Bathroom Plumber Tierrasanta San Diego, CA
Water Filtration Services Near Me Tierrasanta San Diego, CA
Garbage Disposal Installation Tierrasanta San Diego, CA
Shower Repair Tierrasanta San Diego, CA
Plumbing Installation Tierrasanta San Diego, CA
Plumber Shower Installation Tierrasanta San Diego, CA
Water Filtration Services Near Me Tierrasanta San Diego, CA
Near Me Plumber Tierrasanta San Diego, CA
Best Plumber Tierrasanta San Diego, CA
Local Plumbing Near Me Tierrasanta San Diego, CA
Affordable Plumbing Near Me Tierrasanta San Diego, CA
Shower Repair Tierrasanta San Diego, CA
Plumbing Installation Tierrasanta San Diego, CA
Shower Repair Tierrasanta San Diego, CA
Residential Plumbing Services Near Me Tierrasanta San Diego, CA
Near Me Plumber Tierrasanta San Diego, CA
Garbage Disposal Installation Tierrasanta San Diego, CA
Residential Plumbing Contractors Near Me Tierrasanta San Diego, CA
Garbage Disposal Installation Tierrasanta San Diego, CA
Plumber Shower Installation Tierrasanta San Diego, CA
Water Line Repair Tierrasanta San Diego, CA
Local Plumbing Near Me Tierrasanta San Diego, CA
Garbage Disposal Installation Tierrasanta San Diego, CA
Water Leak Repair Tierrasanta San Diego, CA
Best Plumbing Tierrasanta San Diego, CA
Affordable Plumber Near Me Tierrasanta San Diego, CA
Residential Plumbing Repair Near Me Tierrasanta San Diego, CA
Bathroom Plumber Tierrasanta San Diego, CA
Plumbing Installation Near Me Tierrasanta San Diego, CA
Gas Line Plumber Tierrasanta San Diego, CA
Plumber Company Near Me Tierrasanta San Diego, CA
Plumbers In Tierrasanta San Diego, CA
Gas Line Plumber Tierrasanta San Diego, CA
Plumbing Installation Near Me Tierrasanta San Diego, CA
Gas Line Plumber Tierrasanta San Diego, CA
Local Plumber Tierrasanta San Diego, CA
Residential Plumbing Services Near Me Tierrasanta San Diego, CA
Residential Plumber Tierrasanta San Diego, CA
Kitchen Plumbing Tierrasanta San Diego, CA
Plumber Company Near Me Tierrasanta San Diego, CA
Plumber For Clogged Toilet Near Me Tierrasanta San Diego, CA
Water Heater Installers Tierrasanta San Diego, CA
Plumbers In Tierrasanta San Diego, CA
Plumbing Installers Near Me Tierrasanta San Diego, CA
Residential Plumbing Services Near Me Tierrasanta San Diego, CA
Plumbing Installation Services Tierrasanta San Diego, CA
Residential Plumbing Contractors Near Me Tierrasanta San Diego, CA
Plumber For Clogged Toilet Near Me Tierrasanta San Diego, CA
Local Plumbing Near Me Tierrasanta San Diego, CA
Local Plumber Tierrasanta San Diego, CA
Shower Repair Tierrasanta San Diego, CA
Water Heater Installers Tierrasanta San Diego, CA
Water Line Repair Tierrasanta San Diego, CA
Plumber Toilet Repair Tierrasanta San Diego, CA
Plumber Toilet Repair Tierrasanta San Diego, CA
Near Me Plumber Tierrasanta San Diego, CA
Water Line Repair Tierrasanta San Diego, CA
Plumbing Installation Tierrasanta San Diego, CA
Shower Repair Tierrasanta San Diego, CA
Plumbing Installation Services Tierrasanta San Diego, CA
Best Plumbing Tierrasanta San Diego, CA
Water Filtration Services Near Me Tierrasanta San Diego, CA
Water Heater Installers Tierrasanta San Diego, CA
Shower Repair Tierrasanta San Diego, CA
Plumber Toilet Repair Tierrasanta San Diego, CA
Bathroom Plumber Tierrasanta San Diego, CA
Finding A Good Seo Solutions Tierrasanta San Diego, CA
Finding A Local Seo Optimization Services Tierrasanta San Diego, CA
Black Mountain Plumbing
Table of Contents
- – Water Leak Repair Tierrasanta San Diego, CA
- – Black Mountain Plumbing
- – Plumber Company Near Me Tierrasanta San Diego, CA
- – Shower Repair Near Me Tierrasanta San Diego, CA
- – Gas Line Plumber Tierrasanta San Diego, CA
- – Plumbing Installers Near Me Tierrasanta San D...
- – Water Heater Installers Tierrasanta San Dieg...
- – Plumber For Clogged Toilet Near Me Tierrasan...
- – Kitchen Plumbing Tierrasanta San Diego, CA
- – Residential Plumbing Services Near Me Tierra...
- – Water Filtration Services Near Me Tierrasant...
- – Near Me Plumber Tierrasanta San Diego, CA
- – Plumbing Installers Near Me Tierrasanta San ...
- – Residential Plumbing Repair Near Me Tierrasa...
- – Plumbing Installation Services Tierrasanta S...
- – Best Plumber Tierrasanta San Diego, CA
- – Black Mountain Plumbing
Latest Posts
Rancho Cucamonga Web Design Agencies
Sorrento Valley San Diego Toilet Plumber Near Me
Rancho Santa Fe Gas Plumber
More
Latest Posts
Rancho Cucamonga Web Design Agencies
Sorrento Valley San Diego Toilet Plumber Near Me
Rancho Santa Fe Gas Plumber