All Categories
Featured
Table of Contents
- – OCRV Center
- – Why Is My RV AC Not Cooling Properly?
- – Dirty Filters and Coils Blocking Airflow
- – How Dirt Builds Up Over Time
- – Quick Cleaning Steps for Immediate Relief
- – When Professional Deep Cleaning Is Needed
- – What Causes RV AC to Blow Warm Air?
- – Faulty Run or Start Capacitor
- – Symptoms and Testing Methods
- – Replacement Process and Parts
- – Evaporator Coil Freezing Issues
- – Restricted Airflow Causes
- – Defrost and Prevention Strategies
- – Electrical or Voltage Problems
- – Campground Power Fluctuations
- – Breaker and Wiring Checks
- – How to Fix RV AC Short Cycling
- – Oversized Unit or Load Imbalance
- – Sizing Guidelines for Motorhomes
- – Balancing Solutions
- – Dirty Condenser Coils
- – Exterior Cleaning Techniques
- – Impact on Cycle Times
- – Faulty Control Board or Relays
- – Diagnostic Tools
- – Repair vs. Replacement
- – Common Noises and Leaks in Motorhome AC Units
- – Fan Motor or Blower Noises
- – Bearing Wear Identification
- – Lubrication and Replacement
- – Condensate Drain Clogs and Water Leaks
- – Clearing Blockages
- – Sealing to Prevent Interior Damage
- – Compressor or Vibration Sounds
- – Mounting Checks
- – Isolation Techniques
- – RV AC Repair Costs and What to Expect
- – Breakdown of Typical Service Prices
- – Cleaning and Maintenance Range
- – Component Replacement Costs
- – Factors Influencing Final Quotes
- – Brand-Specific Parts
- – Emergency vs. Scheduled
- – Preventative Maintenance Tips for Motorhome AC
- – Regular Filter and Coil Cleaning
- – Seasonal Schedules for California Climates
- – Tools and Safety Precautions
- – Annual Professional Inspections
- – Comprehensive Checklists
- – Extending Unit Lifespan
- – Storage and Off-Season Prep
- – Winterization Steps
- – Spring Startup Best Practices
- – Choosing the Right RV Repair Service in Califo...
- – Importance of Certified Technicians
- – Refrigerant Handling Compliance
- – Brand-Specific Expertise
- – Benefits of Local Expertise Near Major Routes
- – Quick Access Along Freeways 5 & 91
- – Serving Extensive Areas
- – Our 6 Step RV AC Repair Process: What to Expect
- – Initial Inspection and Diagnostic Testing
- – Component Identification and Repair Planning
- – Execution with OEM Parts
- – Post-Repair Testing and Verification
- – Follow-Up Support
- – Final Quality Assurance
- – Areas We Serve Throughout Southern California
- – Orange County and Inland Empire Coverage
- – Broader Southern California Reach
- – Frequently Asked Questions About RV AC Repair
- – We Can Help! Contact Us Today.
- – OCRV Center
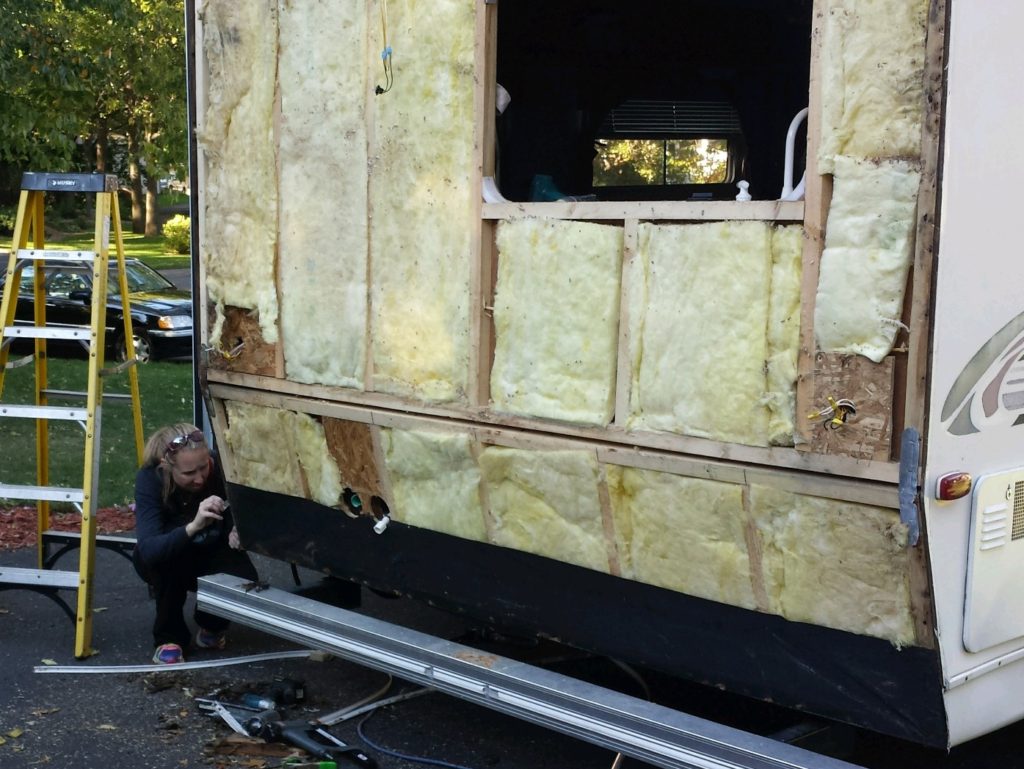
RV AC repair near me becomes a top priority when a motorhome's cooling system breaks down on the road or at a campsite. Motorhome rooftop cooling systems face ongoing road vibration and shock, dust buildup from campsites, and inconsistent voltage from shore power, creating common failures like reduced cooling or complete breakdown. This post examines the most common problems in motorhome AC units, their primary triggers, and proven fixes to return consistent climate control. From simple upkeep tasks to detailed analysis, the focus remains on practical fixes that stop small problems from becoming big headaches on the road.
Many motorhome owners deal with these situations during busy travel periods, when heat turns the interior uncomfortable. Understanding common RV AC problems enables prompt intervention. Dirty components rank highest among causes, followed by electrical problems and refrigerant issues. Addressing them early saves both time and money while preserving comfort and security. Proper troubleshooting and maintenance prolong equipment longevity and deliver steady operation across long trips.
Why Is My RV AC Not Cooling Properly?
RV AC not cooling properly stands out as one of the most reported issues among motorhome owners. The unit operates without adequately reducing interior heat, often due to blocked air movement or low refrigerant levels. Dust buildup from road driving clogs filters and coils, causing the equipment to labor without delivering cold air. Electrical inconsistencies from campground outlets compound the issue, while thermostat inaccuracies give false readings. These elements together lower cooling capacity considerably, transforming a pleasant interior into a hot space. Many owners observe gradual performance decline before complete failure occurs, emphasizing the need for vigilant checks and maintenance routines.
Dirty Filters and Coils Blocking Airflow
Filters serve as the first line of defense against dust and debris met on the road, trapping particles like dust, pollen, bugs, and grit that might otherwise flow into the interior. Evaporator coils within the system gather moisture plus pollutants, forming insulating layers that reduce heat absorption and airflow volume. Blocked flow elevates system temperatures, makes the compressor work harder than necessary, and finally produces insufficient cold air delivery. Clean filters monthly during heavy use by taking them out and washing gently, steering clear of forceful sprays that damage fins. For coils, use a soft brush or coil cleaner spray after turning off power. Thorough professional service cleans internal passages, eliminates tough deposits, reestablishes proper circulation, and often improves cooling performance noticeably. Routine attention to these components prevents cascading failures and upholds effective RV cooling system care. For related rv maintenance guidance, explore RV maintenance services.
How Dirt Builds Up Over Time
Debris collection takes place steadily through exposure to highways, construction zones, and campground environments. Deposits of grime and particles coat coils and obstruct filters, lowering performance well before clear signs emerge. Observing deposits enables prompt identification. Frequent visual assessments during upkeep reveal accumulation trends particular to specific driving and camping habits.
Quick Cleaning Steps for Immediate Relief
Start with power disconnection, accessing the filter compartment, and taking out the filter element to examine. Wash gently with moderate water flow to remove debris. Allow complete drying to prevent mold growth. This process delivers quick air movement recovery leading to clear cooling gains in minutes. Frequent implementation on journeys preserves reliable function.
When Professional Deep Cleaning Is Needed
Continued inadequate cooling after filter changes indicates concealed coil buildup needing professional tools and knowledge. Professionals apply gentle, effective cleaners, pressure-controlled rinsing, and complete drying processes to reinstate optimal cooling performance. This level of service addresses hidden restrictions that routine care cannot fully treat. Planning recurring professional maintenance extends component life and stops crisis interventions. Additional information on complete maintenance is available through RV service options.
Reports from RV service organizations indicate that airflow restrictions contribute to over forty percent of cooling-related service calls in rooftop units. Following consistent maintenance schedules greatly lowers these incidents and maintains equipment dependability. These common causes explain why many query reasons for poor RV cooling. Early intervention prevents escalation into severe breakdowns. Contact specialists for a complimentary diagnostic on RV AC repair near me.
What Causes RV AC to Blow Warm Air?
RV AC blowing warm air produces sudden unease, especially as the fan keeps operating yet cool output disappears. This symptom points to failures in temperature transfer functions or insufficient compressor operation. Refrigerant charge decreases from minor leaks at joints or evaporator wear, removing the cooling evaporation process required for cooling. Capacitor degradation prevents adequate starting torque and continuous motor operation, causing reduced function or full stoppage. Collected debris on heat exchange surfaces hinders heat release and uptake, additionally lowering cooling ability. Inconsistent power from hookups or inverters introduce voltage drops that compromise compressor efficiency. Diagnosis commences with basic visual and auditory assessments prior to advancing to pressure checks, electrical testing, and part isolation. Seasonal storage and infrequent use accelerate these failures by allowing seals to dry and contaminants to settle undisturbed.
Faulty Run or Start Capacitor
Capacitors hold and release electrical charge to begin motor operation for compressor and fan while keeping performance stable under demand. Time and temperature degrade capacitor capacity, leading to humming sounds without startup or intermittent weak performance. Symptoms and testing methods include case swelling or leakage, strange humming when starting, and multimeter checks indicating sub-spec readings. Replacement requires selecting capacitors with identical microfarad ratings and voltage ratings to maintain compatibility and protect system elements. Installation involves safely discharging residual charge, taking out old components, securing new ones with proper mounting hardware, and checking connections prior to system activation. This replacement commonly restores full cooling instantly and eliminates ongoing startup issues that disrupt travel. These failures occur more often in units exposed to extreme temperatures or surges. For further electrical support, review RV electrical repair.
Symptoms and Testing Methods
Watch for humming with no compressor start or postponed engagement. Use a multimeter set to capacitance mode to compare measured values against rated specifications printed on the component. These procedures verify issues rapidly and securely and guide replacement decisions accurately.
Replacement Process and Parts
Obtain precise-match capacitors for system compatibility and warranty preservation. Safely discharge using insulated instruments, swap components, and tighten connections securely. Perform post-installation testing to confirm proper startup and steady operation.
Evaporator Coil Freezing Issues
Restricted airflow causes evaporator surfaces to reach sub-freezing levels, forming ice layers that block air passage and halt proper cooling. Low refrigerant charge or clogged filters initiate this condition by limiting heat transfer efficiency. Defrost and prevention strategies require immediate power disconnection to allow natural thawing, followed by thorough component cleaning and airflow verification. Incorporating air monitoring or regular inspections prevents recurrence while maintaining consistent dehumidification and temperature control. Freezing episodes often intensify in high-humidity environments or following neglected maintenance intervals. For comprehensive cleaning approaches, explore RV maintenance resources.
Restricted Airflow Causes
Restricted filters, blocked passages, or accumulated matter decrease air movement over evaporator. This cooling below dew point forms ice layers that continues to limit flow through a worsening cycle.
Defrost and Prevention Strategies
Ensure thorough thawing before power-up. Apply routine filter swaps and coil examinations to prevent freezing conditions. Monitor humidity levels during operation to anticipate potential issues.
Electrical or Voltage Problems
Undervoltage conditions from inconsistent campground power supplies or inadequate onboard inverters stop compressors from achieving rated speed. Breaker and wiring checks confirm stable voltage delivery and identify loose connections or damaged conductors. Incorporating voltage tracking or proper-gauge heavy cords mitigates these problems in variable electrical environments. Electrical irregularities heavily contribute to warm output in different models. Additional electrical diagnostics are available through RV electrical upgrades.
Campground Power Fluctuations
Inconsistent voltage influences torque and compressor operation. Regular voltage checks reveal unstable locations promptly.
Breaker and Wiring Checks
Check breakers for repeated trips and wiring for damage or deterioration. Secure all connections to maintain reliable power delivery.
Effective diagnosis converts RV AC blowing warm air causes into solvable fixes. Precise diagnosis avoids ongoing discomfort. Reach out for expert RV air conditioner repair support. Explore collision-related concerns via RV collision repair when needed.
How to Fix RV AC Short Cycling
RV AC short cycling appears as rapid compressor cycling which limits humidity removal and steady temperatures and accelerates part wear. Oversize systems cool areas too fast, while restricted airflow or electrical faults cause premature shutdowns. Pinpointing the precise cause enables corrective measures that establish steady, efficient performance. This issue commonly progresses steadily, with cycle durations shortening progressively until repair is required.
Oversized Unit or Load Imbalance
An oversized air conditioner achieves setpoint temperatures too quickly, triggering early shutdown and quick rebound. Sizing guidelines for motorhomes emphasize matching BTU capacity to interior cubic volume, insulation quality, window area, and regional climate conditions. Balancing solutions encompass vent tuning, extra fans, or zone controls to achieve even temperature distribution in the coach. Correct sizing ensures longer run times which enhance moisture control and comfort on long trips.
Sizing Guidelines for Motorhomes
Calculate requirements based on square footage, ceiling height, insulation R-value, and expected ambient temperatures. Too-small units operate nonstop without achieving target; too-large units cycle quickly.
Balancing Solutions
Adjust register openings and consider ceiling fans to promote uniform air distribution. Zone controls offer targeted management in divided spaces.
Dirty Condenser Coils
Exterior condenser coils accumulate road dirt, insects, and ambient particles which block heat release and activate safety shutdowns. Exterior cleaning techniques utilize low-pressure water application combined with specialized coil cleaners and soft-bristled brushes to clear buildup without harming fins. This maintenance task frequently extends compressor run durations and enhances overall system efficiency. Ignored condenser coils heavily contribute to cycling issues in different models. For roof upkeep needs, review RV roof repair.
Exterior Cleaning Techniques
Apply approved cleaners, allow proper dwell time, and rinse gently to preserve coil integrity. Regular attention prevents efficiency loss from insulation buildup.
Impact on Cycle Times
Clean surfaces facilitate longer run periods, improving temperature stability and dehumidification effectiveness throughout the interior.
Faulty Control Board or Relays
Electronic control boards manage timing sequences and relay components switch high-current loads; degradation or manufacturing defects cause erratic cycling patterns. Diagnostic tools including multimeters and testers show circuit breaks, voltage loss, or failed elements. Repair vs. replacement evaluations determine whether localized fixes suffice or full board substitution becomes necessary for reliable ongoing function. Electrical diagnostics isolate these faults accurately and efficiently. Related slide mechanisms can be addressed through RV slide-out repair.
Diagnostic Tools
Digital multimeters check voltage and continuity at board points. Advanced testers reveal relay issues or board component problems.
Repair vs. Replacement
Localized solder work possible in certain situations; widespread damage typically requires complete board replacement to return dependable operation.
Stable performance resumes with precise corrections. Schedule a review for motorhome AC repair needs. Additional fiberglass work information is available at RV fiberglass repair.
Common Noises and Leaks in Motorhome AC Units
Abnormal sounds or noticeable water presence point to developing mechanical and drainage concerns within motorhome AC units. Grinding, rattling, squealing, or dripping water inside the cabin indicate component wear, blockages, or mounting issues that escalate without intervention. Timely recognition and fixing protect cabin elements and keep operation peaceful. Highway vibration hastens degradation in roof-mounted systems under continuous motion and conditions.
Fan Motor or Blower Noises
Grinding, squealing, or rattling noises during fan operation typically indicate bearing wear identification resulting from insufficient lubrication, contaminant intrusion, or prolonged high-speed use. Interim lubrication extends service life briefly, but switching to sealed, lifetime-lubricated bearings removes noise permanently and prevents motor failure. Consistent lubrication during planned maintenance substantially lengthens bearing service and lowers noise. Handling these noises promptly prevents follow-on failures impacting cooling. For related body concerns, check RV body shop capabilities.
Bearing Wear Identification
Listen attentively during startup and running phases for irregular grinding or high-pitched squealing. Visual examination often reveals rust, scoring, or excessive shaft play confirming wear.
Lubrication and Replacement
Apply proper lubricant if points are reachable; otherwise replace the entire motor assembly for optimal quiet operation and longevity.
Condensate Drain Clogs and Water Leaks
Blocked condensate drainage paths trap moisture produced during cooling cycles, resulting in interior drips, staining, and potential mold development. Clearing blockages applies air pressure, flexible tools, or vinegar to clear paths without line damage. Sealing to prevent interior damage requires thorough inspection of drain tubes, fittings, and evaporator pan connections followed by application of waterproof sealant where leaks originate. Effective drainage management prevents water-related interior damage and maintains air quality. Related roof sealing information can be found through RV roof repair.
Clearing Blockages
Use gentle tools to dislodge debris without puncturing lines. Use mild acid flushes to dissolve scale and deposits.
Sealing to Prevent Interior Damage
Inspect all connections for cracks or loose fittings. Apply proper sealants to stop water paths into the cabin.
Compressor or Vibration Sounds
Loose mounts or worn isolators turn regular compressor sound into prominent thumping or rattling in the coach. Mounting checks include securing hardware and checking isolators for wear or cracking. Isolation techniques include installation of additional dampening materials or complete mount replacement to minimize vibration transmission to the coach structure. Correct mounting improves system stability and significantly lowers interior noise. For frame integrity, see RV frame repair.
Mounting Checks
Tighten mounting hardware to specification and inspect rubber isolators for signs of deterioration or compression loss.
Isolation Techniques
Install additional dampening or new mounts for quieter function and less stress.
Issues like these resolve efficiently with skilled intervention. Local RV AC repair near me experts deliver precise, trustworthy solutions that reduce breakdown anxiety and build trust through certified work and satisfaction guarantees.
RV AC Repair Costs and What to Expect
RV AC repair costs fluctuate based on problem complexity, unit brand, required components, and labor requirements, but clear breakdowns help owners plan budgets. Standard cleaning and diagnostic services range from $250 to $450, and component swaps like capacitors or motors average $400–$900. Refrigerant work including leak repair and recharge averages $300–$600, and complete rooftop replacement falls $1,000–$1,800. Labor rates account for technician skill, overhead, and area. Transparent pricing discussions avoid surprises and foster trust during service.
Breakdown of Typical Service Prices
Routine cleaning and upkeep stay among the most affordable services. Part replacement costs reflect high-quality components and expert labor. Full system repairs provide outstanding long-term benefits when damage is significant.
Cleaning and Maintenance Range
Basic services concentrate on filter and coil restoration for rapid efficiency recovery and minimal expense.
Component Replacement Costs
Components like capacitors, motors, and boards differ based on brand specs and stock.
Factors Influencing Final Quotes
Brand-specific parts designed for Dometic, Coleman, Furrion, and similar manufacturers ensure proper fit and performance but influence overall expense levels. Urgent or off-hours calls include premiums for quick response and priority. Installation challenges from mounting position may extend labor and increase charges. Geographic position in service territory influences pricing.
Brand-Specific Parts
Manufacturer-spec parts maintain warranty and compatibility.
Emergency vs. Scheduled
Scheduled work usually costs less than emergency calls needing instant response.
Clear pricing empowers smart decisions. Get your personalized estimate today. Additional collision repair insights available at RV collision repair.
Preventative Maintenance Tips for Motorhome AC
Preventative maintenance significantly increases rooftop AC durability and avoids unexpected failures during travel. Steady maintenance keeps efficiency high, cuts energy use, and avoids unexpected expenses. Those using regular protocols enjoy much fewer urgent repairs and greater reliability across different travel situations.
Regular Filter and Coil Cleaning
Seasonal schedules recommend monthly filter rinsing during active travel periods and biannual coil examinations regardless of usage intensity. Use gentle, safe cleaners made for evaporator and condenser coils with soft brushes to avoid fin damage. Thorough drying after cleaning eliminates moisture-related mold development risks. Regular application keeps airflow open and heat transfer at peak during cooling periods.
Seasonal Schedules for California Climates
Change schedule per regional dust, allergens, and travel through varied climates. Increased frequency helps units in dusty or high-pollen areas.
Tools and Safety Precautions
Employ low-pressure water sources, manufacturer-approved cleaners, and personal protective equipment during maintenance activities. Cut power before working on any part for complete safety.
Annual Professional Inspections
Detailed annual inspections by certified professionals spot developing issues in wear, refrigerant, electrical, and mechanical areas before failure. These inspections include performance testing, leak detection, and lubrication of moving parts where applicable. Certified checks identify minor concerns overlooked by owners, avoiding escalation to large repairs. For slide-out upkeep, review RV slide-out repair.
Comprehensive Checklists
Address electrical, refrigerant, mechanical, and structural elements in each examination.
Extending Unit Lifespan
Regular professional attention significantly increases operational years and maintains peak efficiency throughout the unit's service life.
Storage and Off-Season Prep
Proper winterization protects sensitive components from freezing temperatures, moisture intrusion, and UV degradation during storage periods. Fully cover the roof unit, drain lines completely, secure electrical connections, and protect exterior surfaces. Startup in spring requires complete inspection, filter replacement, coil verification, and testing prior to use. Proper prep protects from weather damage and provides instant reliability upon reactivation.
Winterization Steps
Install protective covers, drain water-prone sections, and disconnect power to avoid unintended operation.
Spring Startup Best Practices
Conduct full system checks, clean accumulated debris, and verify cooling performance before seasonal journeys begin.
Steady attention stops unexpected costs. Book preventative maintenance for ongoing reliability. Norco Rv Specialists. Explore RV remodel possibilities when updating systems
Choosing the Right RV Repair Service in California
Picking a suitable repair shop strongly impacts quality, timing, and overall experience. Focus on shops showing certifications, motorhome expertise, and strong customer reviews. Review speed, parts access, and communication when deciding.
Importance of Certified Technicians
Refrigerant handling compliance needs EPA certification for compliant, responsible handling of controlled substances. Specialized brand education ensures understanding of unique features, testing, and repair approaches across models. Certification credentials verify ongoing education and adherence to industry standards that protect both equipment and owners. Expert certification decreases improper work that results in recurring failures or hazards. For paint-related needs, check RV paint shop capabilities.
Refrigerant Handling Compliance
Complies with environmental regulations for refrigerant handling.
Brand-Specific Expertise
Manages Dometic, Coleman, and similar brands accurately.
Benefits of Local Expertise Near Major Routes
Nearby location minimizes towing needs and enables rapid roadside assistance. Broad regional coverage guarantees access no matter travel routes in the area. Area-specific knowledge covers climate, common problems, and suitable repair techniques for local conditions. For further body work, review RV body shop.
Quick Access Along Freeways 5 & 91
Convenient positioning enables fast response on key highways.
Serving Extensive Areas
Comprehensive regional coverage supports owners throughout Southern California with consistent quality standards.
Dependable local help cuts downtime. Contact RV AC repair near me specialists for dependable help. Additional information available on the about page.
Our 6 Step RV AC Repair Process: What to Expect
A systematic approach delivers consistent, high-quality outcomes from initial contact through final verification. Every step includes detailed records, open communication, and quality checks for full customer approval.
Initial Inspection and Diagnostic Testing
Technicians conduct comprehensive visual examinations and perform electrical, pressure, and performance measurements to establish baseline conditions. Diagnostic procedures identify both obvious and subtle issues affecting operation. This starting point steers later repair planning correctly.
Component Identification and Repair Planning
Thorough evaluation focuses on primary causes while creating clear repair plans and pricing. Planning limits unforeseen issues and coordinates expectations across service.
Execution with OEM Parts
Service uses OEM or high-quality equivalent parts following standard procedures and safety rules. Expert execution maintains compatibility, reliability, and warranty validity.
Post-Repair Testing and Verification
Comprehensive checks confirm returned cooling power, quiet operation, airflow, and system balance. Verification includes customer walkthroughs demonstrating proper function and addressing any questions.
Follow-Up Support
Warranty documentation accompanies completed work, providing coverage periods and guidance for continued optimal performance. Ongoing support resolves any post-service concerns promptly.
Final Quality Assurance
Full satisfaction review and detailed records complete the work. Final review ensures complete owner approval before release.
Structured processes ensure lasting results. Inquire about our streamlined approach. Explore additional repair options through RV repair services.
Areas We Serve Throughout Southern California
Broad area service guarantees reachability no matter position in the region. Strategic positioning supports rapid response across urban, suburban, and rural areas alike.
Orange County and Inland Empire Coverage
Important centers such as Anaheim, Santa Ana, Irvine, Huntington Beach, Yorba Linda, Chino Hills, and vicinity receive focused attention. Area expertise supports efficient routing and rapid arrival.
Broader Southern California Reach
Coverage reaches Los Angeles, Riverside, San Bernardino, Ventura, and San Diego Counties. Extensive service preserves steady standards across different locations.
Comprehensive service across key regions keeps you covered. OCRV Center, 23281 La Palma Ave. Yorba Linda CA 92887, (714) 909-1444 stands ready as local RV AC repair near me experts. Review customer experiences on the testimonials page.
Frequently Asked Questions About RV AC Repair
How much does RV AC repair near me cost in California?
Costs usually fall between $250 and $1,800 based on the issue and unit type. Routine cleaning and diagnostic evaluations typically cost $250 to $450, while individual component replacements such as capacitors or fan motors typically cost $400 to $900. Refrigerant recovery and recharge procedures average $300 to $600, and complete rooftop unit replacement projects generally fall between $1,000 and $1,800. Brand needs, part stock, and urgency influence total cost. Expert shops provide clear estimates in advance, guaranteeing predictable costs and no surprises. For related service information, visit RV service.
Why is my motorhome AC blowing warm air?
Typical causes encompass refrigerant leaks, weak capacitors blocking compressor start, or dirty coils reducing heat exchange. Voltage inconsistencies and built-up grime also play roles in this issue. Start by checking filters, power source, and thermostat. Professional diagnostics pinpoint exact issues and apply correct fixes for returned cooling. Correcting fundamental problems avoids future issues. Additional guidance at RV maintenance.
How to clean RV air conditioner filters effectively?
Carefully take out filters, rinse with moderate pressure, and ensure complete drying prior to reinstall. Avoid harsh detergents or excessive force that might distort filter media or surrounding components. Implement monthly cleaning during periods of frequent use, particularly in dusty environments. This simple task keeps airflow open and stops performance drops. Steady maintenance produces clear efficiency benefits. Related upkeep advice available through RV maintenance.
What causes RV AC short cycling?
Excessively large units satisfy temperature settings prematurely, dirty condenser surfaces trigger thermal protection shutdowns, or malfunctioning control boards disrupt proper timing sequences. Start evaluation with airflow and power checks. Appropriate corrections or component replacements establish stable operation patterns and enhanced comfort levels. Regular upkeep greatly lowers cycling frequency. For electrical-related concerns, check RV electrical repair.
Can I recharge RV AC refrigerant myself safely?
DIY refrigerant recharging poses serious risks of incorrect levels, system harm, and warranty loss without leak repair. Professional service employs recovery systems, leak finders, and exact charging following regulations. Professional work provides accurate charge and sustained safe operation. Attempting DIY methods often leads to more expensive repairs later. Learn more about proper handling at RV service.
Signs my RV AC needs professional repair?
Ongoing warm air, strange noises, water leaks, short cycling, or no startup require prompt expert assessment. Reduced air movement or ice on parts signal emerging issues needing expert help. Postponing service often leads to worse damage and increased costs. Prompt expert evaluation stops problems. Related troubleshooting guidance at RV repair.
Best brands for reliable motorhome AC (Dometic vs Coleman)?
Both Dometic and Coleman units offer excellent reliability and function when maintained correctly. Dometic models frequently receive praise for quiet operation and efficient cooling across various applications. Coleman units perform well in rugged design and reliable operation under stress. Consistent care optimizes reliability for any brand. Compare options and maintenance needs at RV maintenance.
How often should rooftop AC units be serviced?
Arrange annual expert inspections to detect issues before failure. Conduct monthly filter checks and cleaning during frequent use. Seasonal preparation avoids issues at warm-weather startup. Steady service frequency preserves peak performance and prolongs lifespan. For full service scheduling, review RV service offerings.
RV AC not turning on troubleshooting steps?
Verify circuit breaker positions, shore power connections, and thermostat configuration settings initially. Perform reset per manufacturer guidelines if required. Continued failure needs expert testing of capacitors, boards, and wiring. Basic verification steps frequently identify simple resolutions. Complex electrical issues demand expert diagnosis. Additional troubleshooting resources available via RV electrical repair.
Local RV AC repair near me options in Southern California?
Capable shops serve Orange County, Inland Empire, Los Angeles County, and surrounding regions. Choose providers showing certifications, motorhome expertise, and positive reviews. Regional knowledge provides quick response and understanding of area conditions impacting units - Norco Rv Specialists. Comprehensive coverage supports owners across extensive territories. Explore service information through RV repair
Motorhome air conditioning failures produce substantial discomfort and disturb organized travel. Still expert repairs bring considerable relief from heat frustration and return confidence in steady climate control. Peace emerges from knowing expert help is available to fix issues quickly with reliable methods and guarantees. Reasonably, opting for certified repairs, open pricing, and preventative care generates durable performance and great return through prevented breakdowns, extended life, and reduced expenses. OCRV Center, 23281 La Palma Ave. Yorba Linda CA 92887, (714) 909-1444 offers reliable, superior service as trusted regional specialists.
If RV AC repair near me is needed while traveling in California, certified professionals offer quick, trustworthy solutions for motorhome needs. Certified technicians address rooftop units and related systems with precision and attention to detail. Conveniently based in Southern California, service covers surrounding regions effectively. Free consultation estimates offered for fast assessment. Broad experience and satisfaction guarantee deliver returned comfort on all trips. Reach out today to remove cooling worries and continue pleasant journeys with full confidence.
We Can Help! Contact Us Today.
If professional RV AC repair near me becomes necessary in California, certified experts offer quick, dependable service customized for motorhome needs. Professional technicians handle motorhome AC with outstanding care and skill. Strategically based in Southern California, service covers nearby cities efficiently. Consultation estimates available when requested. Substantial experience paired with a satisfaction guarantee guarantees restored cooling performance. Get in touch today to end AC issues and enjoy journeys comfortably.
OCRV Center
Address: 23281 La Palma Ave Yorba Linda, CA 92887Phone: (714) 909-1444
Email: art@ocrvcenter.com
OCRV Center
Rv Repair Near Me Norco, CA
Motorhome Repairs Norco, CA
Rv Furnace Repair Near Me Norco, CA
Rv Water Damage Repair Norco, CA
Motorhome Roof Repair Norco, CA
Rv Blinds Repair Norco, CA
Rv Furnace Troubleshooting Norco, CA
Repair Rv Norco, CA
Motorhome Roof Repair Norco, CA
Repair Rv Awning Norco, CA
Rv Furnace Troubleshooting Norco, CA
Rv Repair Reviews Norco, CA
Recreational Vehicle Repair Norco, CA
Rv Furnace Repair Near Me Norco, CA
Rv Awning Repair Near Me Norco, CA
Rv Electrical Repair Near Me Norco, CA
Rv Furnace Troubleshooting Norco, CA
Repair Rv Norco, CA
Rv Furnace Repair Norco, CA
Rv Repair Near Me Norco, CA
Rv Electrical Repair Norco, CA
Rv Furnace Troubleshooting Norco, CA
Motorhome Repairs Norco, CA
Rv Refrigerator Repair Norco, CA
Awning Repair Rv Norco, CA
Rv Refrigeration Repair Norco, CA
Rv Ac Repair Near Me Norco, CA
Rv Repair Reviews Norco, CA
Rv Furnace Repair Near Me Norco, CA
Rv Refrigerator Repair Norco, CA
Rv Furnace Repair Near Me Norco, CA
Rv Awning Fabric Repair Norco, CA
The Rv Repair Centre Norco, CA
Rv Specialists Norco, CA
Awning Repair Rv Norco, CA
Rv Repair Reviews Norco, CA
The Rv Repair Centre Norco, CA
Motorhome Repair Shops Near Me Norco, CA
Replacement Rv Awning Norco, CA
Rv Ac Repair Near Me Norco, CA
Motorhome Repair Shops Near Me Norco, CA
Rv Electrical Repair Near Me Norco, CA
Motorhome Repairs Norco, CA
Rv Specialists Norco, CA
Repair Rv Awning Norco, CA
Rv Repair Shop Norco, CA
Rv Furnace Repair Norco, CA
Rv Fridge Repair Near Me Norco, CA
Rv Repair Reviews Norco, CA
Rv Electrical Repair Near Me Norco, CA
Motorhome Repair Shops Near Me Norco, CA
Rv Blinds Repair Norco, CA
Replacement Rv Awning Norco, CA
Recreational Vehicle Repair Norco, CA
The Rv Repair Centre Norco, CA
Rv Furnace Repair Near Me Norco, CA
Rv Specialists Norco, CA
Rv Furnace Repair Norco, CA
Rv Specialists Norco, CA
Rv Awning Repair Norco, CA
Motorhome Repairs Norco, CA
Awning Repair Rv Norco, CA
Rv Blinds Repair Norco, CA
Rv Fridge Repair Near Me Norco, CA
Rv Repair Shop Norco, CA
Rv Refrigeration Repair Norco, CA
Motorhome Repairs Norco, CA
Rv Refrigerator Repair Norco, CA
Rv Furnace Repair Norco, CA
The Rv Repair Centre Norco, CA
Repair Rv Norco, CA
Rv Refrigerator Repair Norco, CA
Replacement Rv Awning Norco, CA
Rv Furnace Troubleshooting Norco, CA
Rv Furnace Troubleshooting Norco, CA
Rv Refrigerator Repair Norco, CA
Rv Ac Repair Near Me Norco, CA
Rv Water Damage Repair Norco, CA
In Seo Services Norco, CA
Finding A Local Seo Companies Norco, CA
OCRV Center
Rv Refrigerator Repair Norco, CA
Rv Electrical Repair Near Me Norco, CA
Table of Contents
- – OCRV Center
- – Why Is My RV AC Not Cooling Properly?
- – Dirty Filters and Coils Blocking Airflow
- – How Dirt Builds Up Over Time
- – Quick Cleaning Steps for Immediate Relief
- – When Professional Deep Cleaning Is Needed
- – What Causes RV AC to Blow Warm Air?
- – Faulty Run or Start Capacitor
- – Symptoms and Testing Methods
- – Replacement Process and Parts
- – Evaporator Coil Freezing Issues
- – Restricted Airflow Causes
- – Defrost and Prevention Strategies
- – Electrical or Voltage Problems
- – Campground Power Fluctuations
- – Breaker and Wiring Checks
- – How to Fix RV AC Short Cycling
- – Oversized Unit or Load Imbalance
- – Sizing Guidelines for Motorhomes
- – Balancing Solutions
- – Dirty Condenser Coils
- – Exterior Cleaning Techniques
- – Impact on Cycle Times
- – Faulty Control Board or Relays
- – Diagnostic Tools
- – Repair vs. Replacement
- – Common Noises and Leaks in Motorhome AC Units
- – Fan Motor or Blower Noises
- – Bearing Wear Identification
- – Lubrication and Replacement
- – Condensate Drain Clogs and Water Leaks
- – Clearing Blockages
- – Sealing to Prevent Interior Damage
- – Compressor or Vibration Sounds
- – Mounting Checks
- – Isolation Techniques
- – RV AC Repair Costs and What to Expect
- – Breakdown of Typical Service Prices
- – Cleaning and Maintenance Range
- – Component Replacement Costs
- – Factors Influencing Final Quotes
- – Brand-Specific Parts
- – Emergency vs. Scheduled
- – Preventative Maintenance Tips for Motorhome AC
- – Regular Filter and Coil Cleaning
- – Seasonal Schedules for California Climates
- – Tools and Safety Precautions
- – Annual Professional Inspections
- – Comprehensive Checklists
- – Extending Unit Lifespan
- – Storage and Off-Season Prep
- – Winterization Steps
- – Spring Startup Best Practices
- – Choosing the Right RV Repair Service in Califo...
- – Importance of Certified Technicians
- – Refrigerant Handling Compliance
- – Brand-Specific Expertise
- – Benefits of Local Expertise Near Major Routes
- – Quick Access Along Freeways 5 & 91
- – Serving Extensive Areas
- – Our 6 Step RV AC Repair Process: What to Expect
- – Initial Inspection and Diagnostic Testing
- – Component Identification and Repair Planning
- – Execution with OEM Parts
- – Post-Repair Testing and Verification
- – Follow-Up Support
- – Final Quality Assurance
- – Areas We Serve Throughout Southern California
- – Orange County and Inland Empire Coverage
- – Broader Southern California Reach
- – Frequently Asked Questions About RV AC Repair
- – We Can Help! Contact Us Today.
- – OCRV Center
Latest Posts
Kitchen Hood Service Monterey Park
Hvac Air Conditioning Service La Crescenta
Best Hvac Company Pasadena
More
Latest Posts
Kitchen Hood Service Monterey Park
Hvac Air Conditioning Service La Crescenta
Best Hvac Company Pasadena